Goal – Make objects for virtual worlds
The specific goal of today’s class is to get you familiar enough with the Blender that you can follow along with the hundreds of videos on YouTube as well as the OpenSim Blender tutorials by Aine Caoimhe and Chic Aeon in the OpenSim Virtual Google Group (links at the bottom.)
The Interface – just the basics
Good news! You don’t have to learn what every darn button does in Blender. Most Blender users are using it to make animation, or render beautiful interiors, or for architectural visualization. We are making low poly “game” objects. This means that we will only be using a few of the many menus and buttons in Blender. Yay!
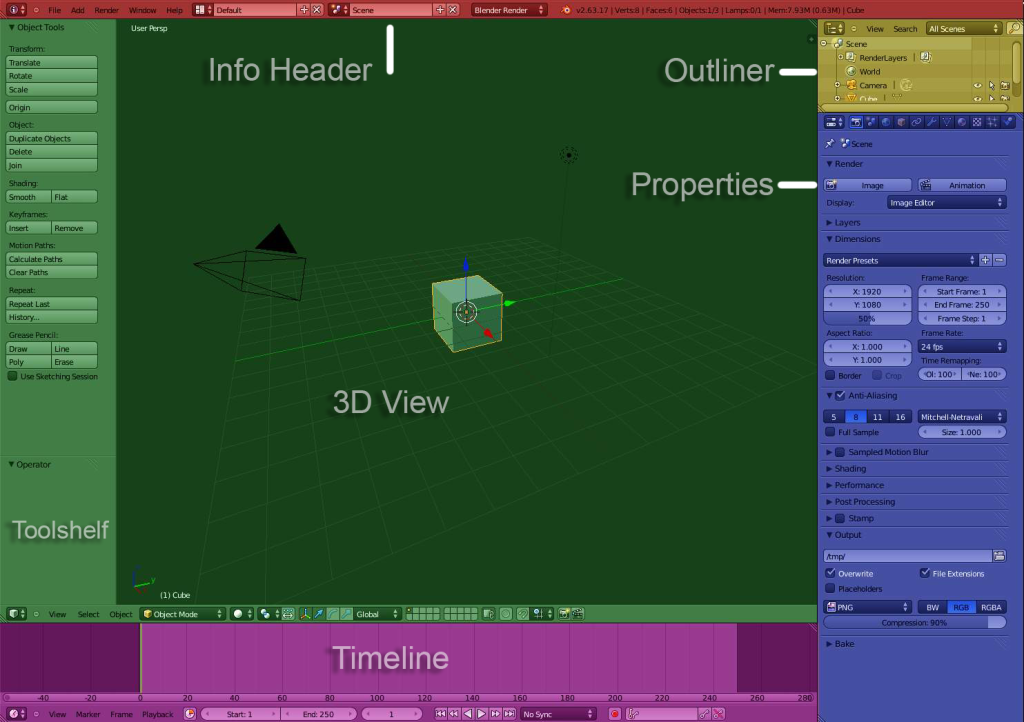
Info Header
File New, Open, Save
User Preferences
Import, Export
Help, Manual
Outliner
Simple list of objects in the scene
Properties
We will concentrate on only Render and Materials. The other fun one here is Modifiers.
3D View
This is Where the magic happens!
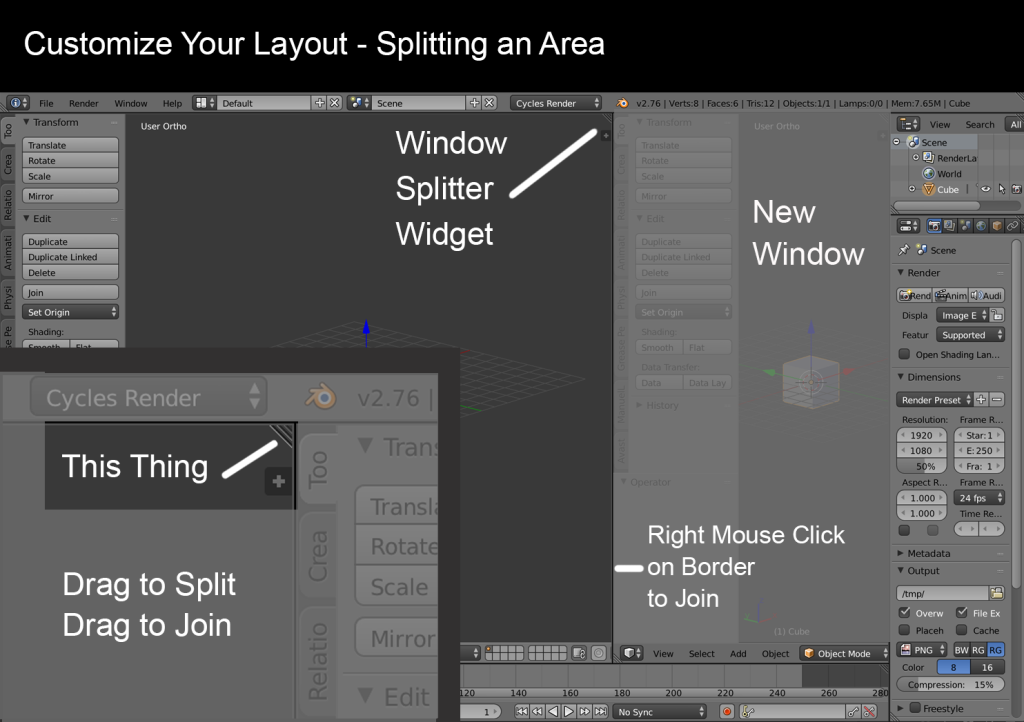
You are in control of your Layout.
- Resize Areas by dragging the borders.
- Split and Join an Area by dragging the Window Splitter Widget. Or Right Click on the border
- Shift > Spacebar to fill the window with one area.
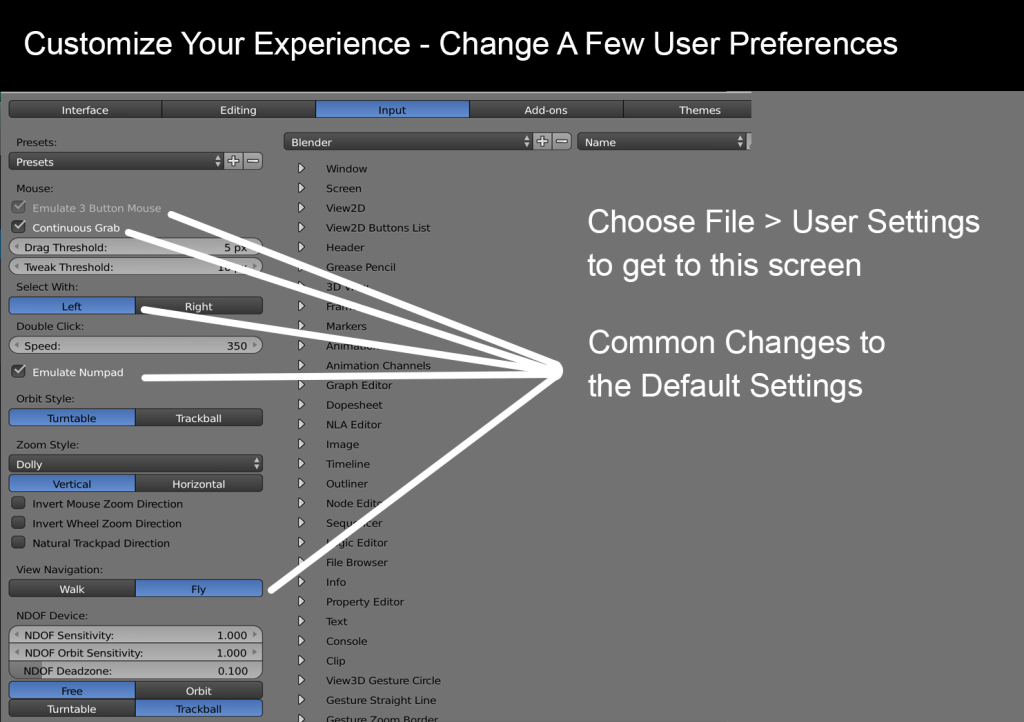
User Preferences
Can you rotate around your cube? If not, you probably need to change your preferences.
Choose File > User Preferences and go to the Input Tab at the top to set just a few of the hundreds of preferences.
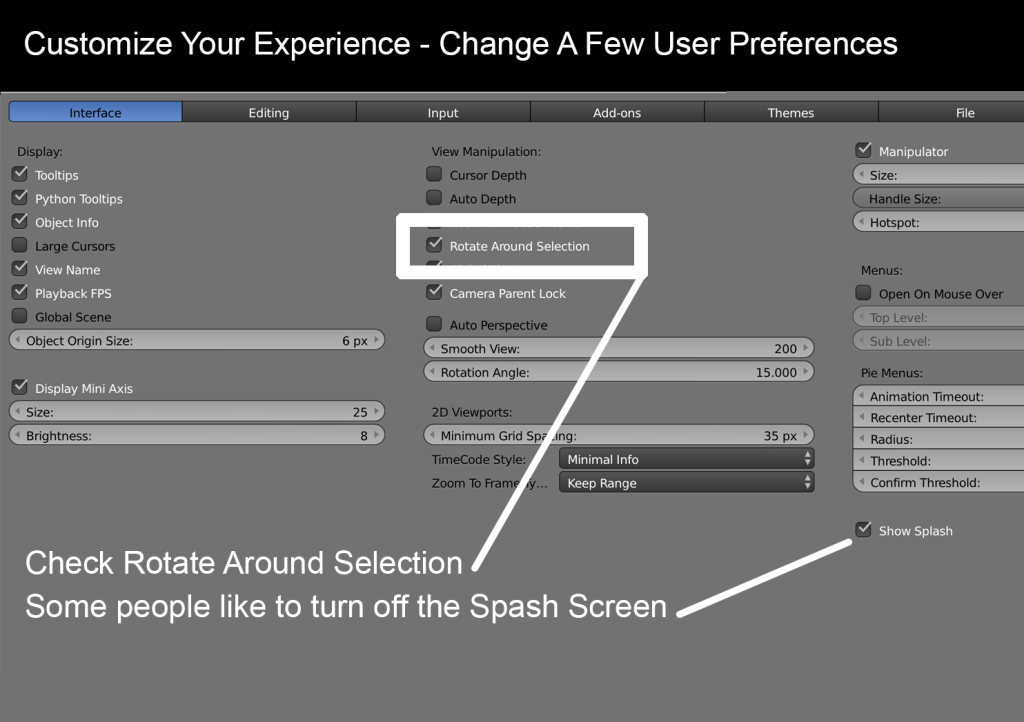
And just one more change, on the Interface Tab.
How to Navigate
(Can vary with system & mouse)
- Scroll wheel to zoom
(Mac: Control + Option + Drag Mouse) - Hold down Middle mouse to rotate and orbit
(Mac: Option + Mouse) - Shift to pan
(Mac: Shift + Option)
Making things
Choose File > New
By default you get a camera, a light, and a cube
Rezzing or Adding Objects
- Shift A to Add an object
- Click on Object to choose it
- Tab to go into Edit Mode
On left is the ToolShelf (T to open & close)
On the right is Object Properties (N to open & close)
The most important shortcuts!
(aka your new mantra)
- Shift C to Center
- 1 for Front View
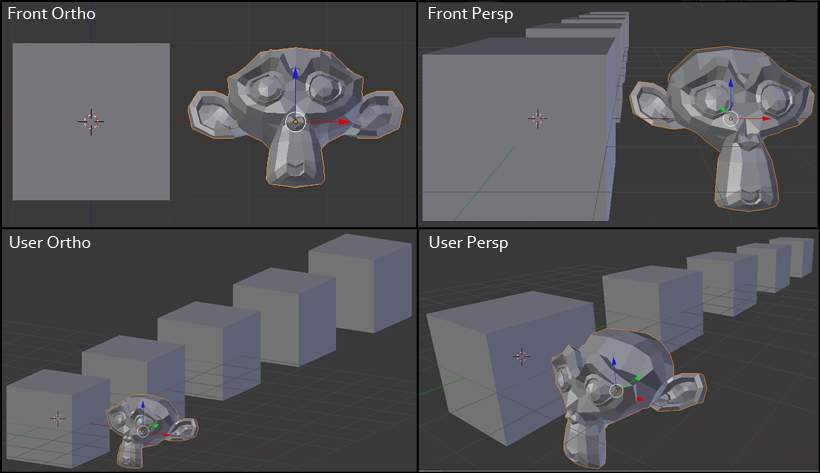
- 5 (Number 5 toggles between Perspective & Ortho. We work in Ortho for better accuracy.)
Object and Edit Menus
Object Mode

Edit Mode

Shortcuts
Most important Shortcuts:
- Shift C
- 1 for Front View
- 5 for Ortho View
Shortcuts to Learn
| Shift C | Center |
| Shift A | Rez a new object |
| X | Delete |
| Tab | Toggle between Object mode and Edit mode |
| T | Toolbar |
| N | Object properties |
| 1, 3, 7 | Front, Side, Top |
| The Selection & Control Shortcuts | |
| A | Select All or None |
| B | Box Select |
| C | Face Select |
| E | Extrude |
| G | Grab |
| Alt click | Select the whole loop |
The Transform Shortcuts |
|
| S | Scale |
| R | Rotate |
| SX, SY, SZ | Scale only on the X or Y or Z |
| Control R | Make a Loop Cut |
RESOURCES
Blender for Opensim Google + Group
https://plus.google.com/u/0/communities/104180785866043143028
Aine Caoimhe
Blender Tutorials for OpenSim users
http://ainetutorials.blogspot.com/
Start with these:
http://ainetutorials.blogspot.com/2015/03/virgins-and-mice-blender-musophobia.html
http://ainetutorials.blogspot.com/2015/03/blender-baby-steps.html
Chic Aeon
Blender Tutorials for OpenSim users
https://plus.google.com/100190052320604204973/posts
Start with these:
https://plus.google.com/100190052320604204973/posts/a8DDxZXB5Eh